Introduction
Before I start this tutorial/blog/walkthrough on how to build your own Android environment for digital forensics purposes, I have to give some context on how I started this amateur adventure.

First of all, I am a challenge creator for my university’s cybersecurity committee and there was a CTF competition held there on the 2nd of September 2023. So, I took it upon myself to make something unique for the participants and myself… And oh boy, was it unique and difficult to do for someone like me. The full code can be found here.
The code is a bit janky, but adjust where necessary.
So, credit where credit is due. I got the inspiration and most of the materials from Sam Browne, an amazing lecturer (not mine tho :P). He has plenty of courses for free on YouTube but the videos and content are more organised on his website.
Installing Android Studio
Ok this first part is pretty easy to do, but since I have something up my sleeves I’m gonna teach you what to do.
- First go download the installer for Android Studio here.
It will be easier if you have a MacBook or a Linux Distro for scripting purposes
-
Go through the normal setup stuff according to the documentation.
-
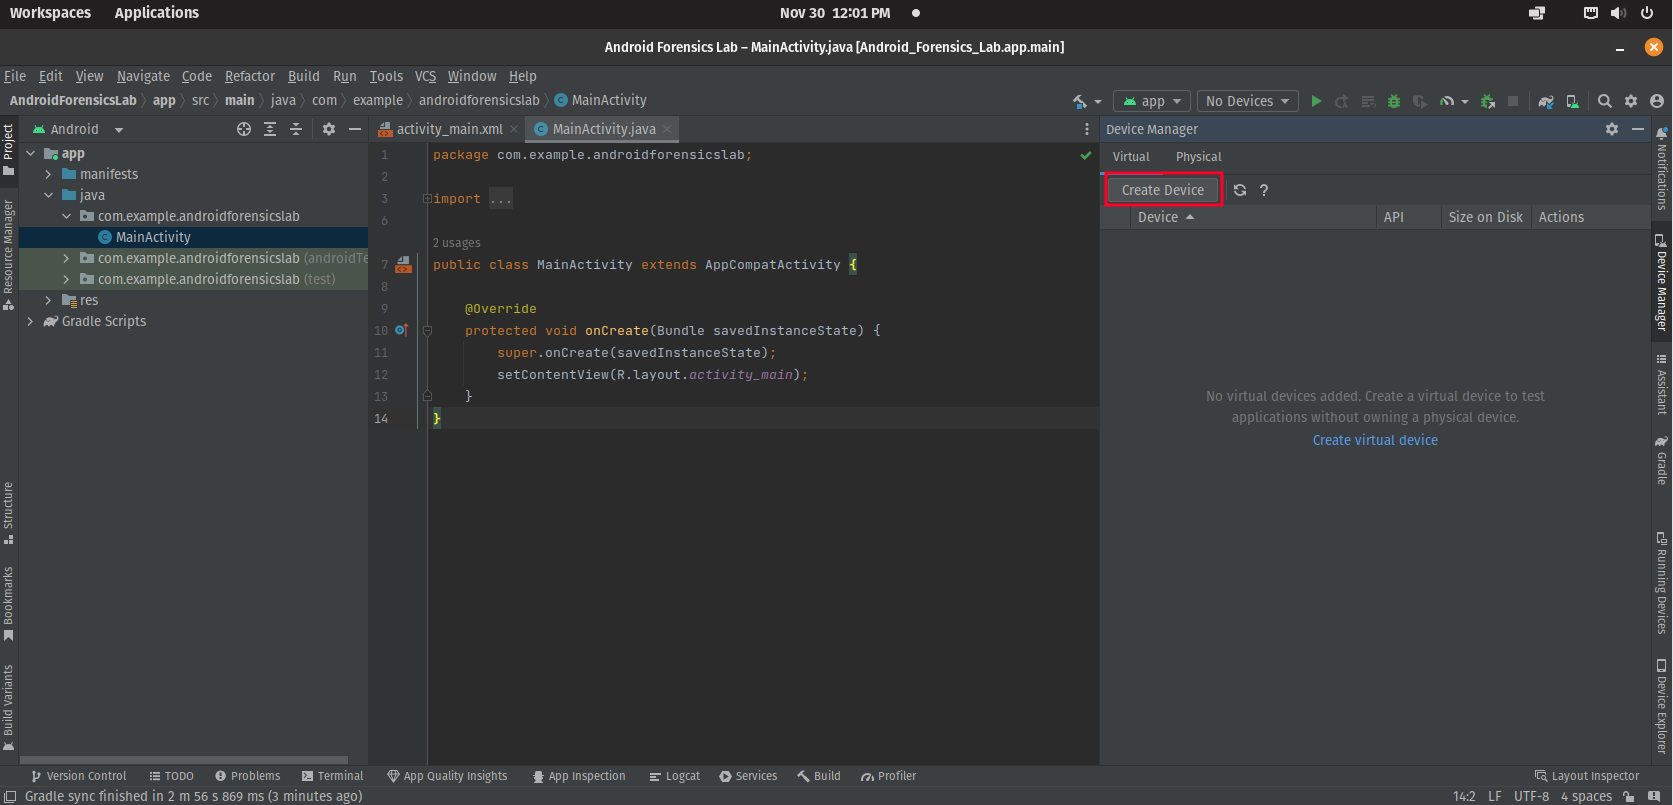
Once you’re done installing Android Studio, let’s make a new project!
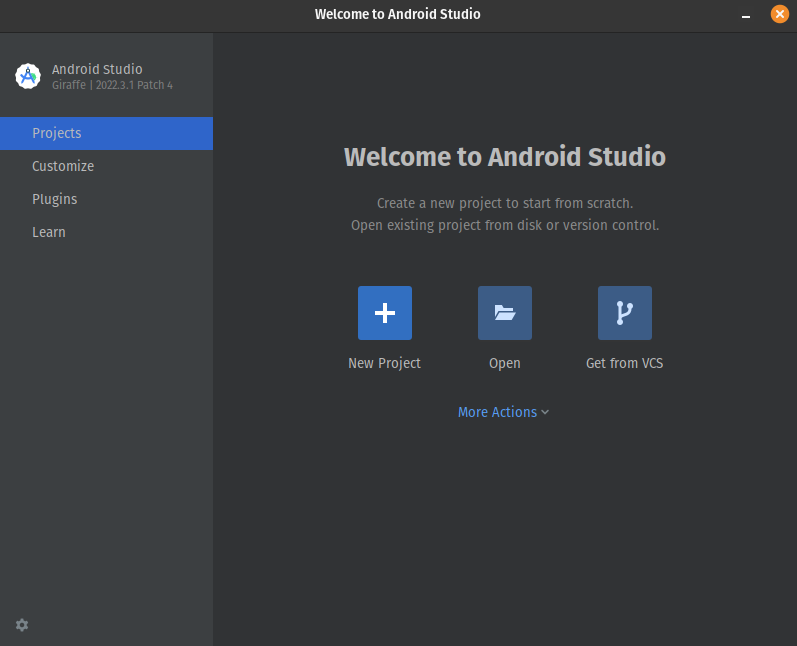
Click on New Project
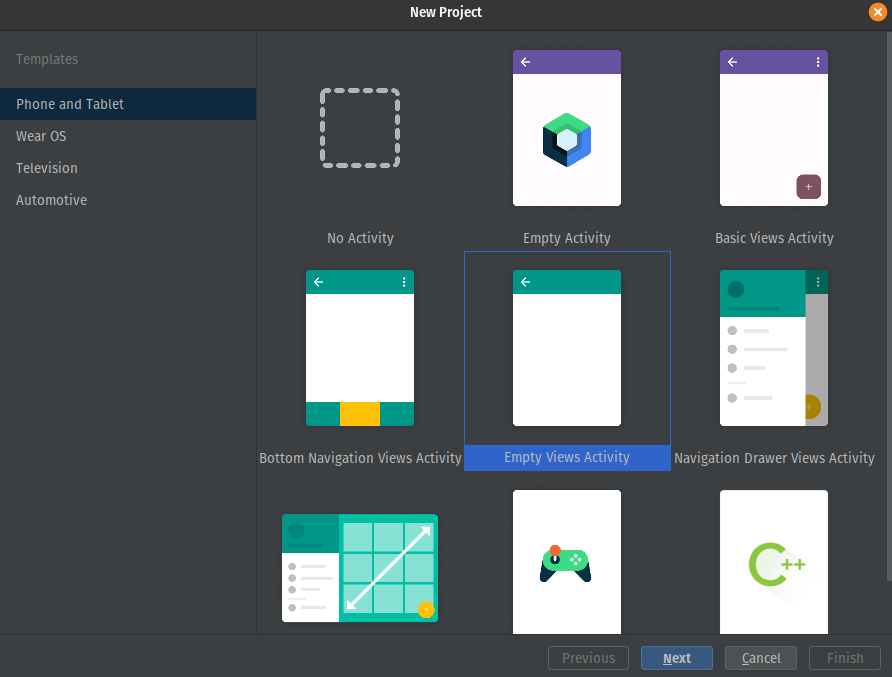
For the template pick anything (I choose EmptyViews Activity because you can choose the option to program in Java if you want a custom app)
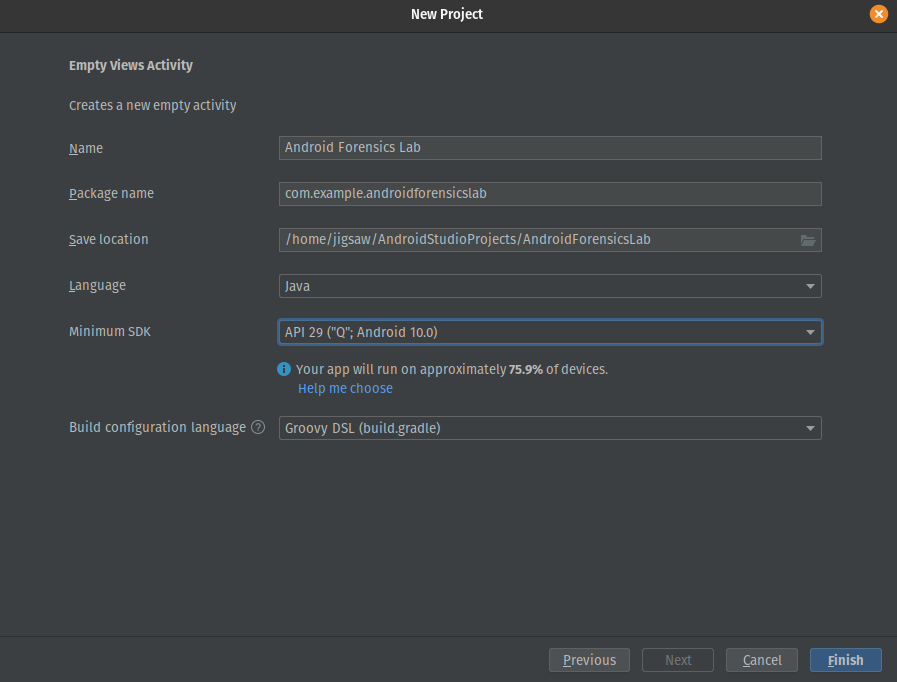
Don’t worry about the name it’s just an empty project but you must select “API 29 (“Q”;Android 10) depending on the architecture of your host”
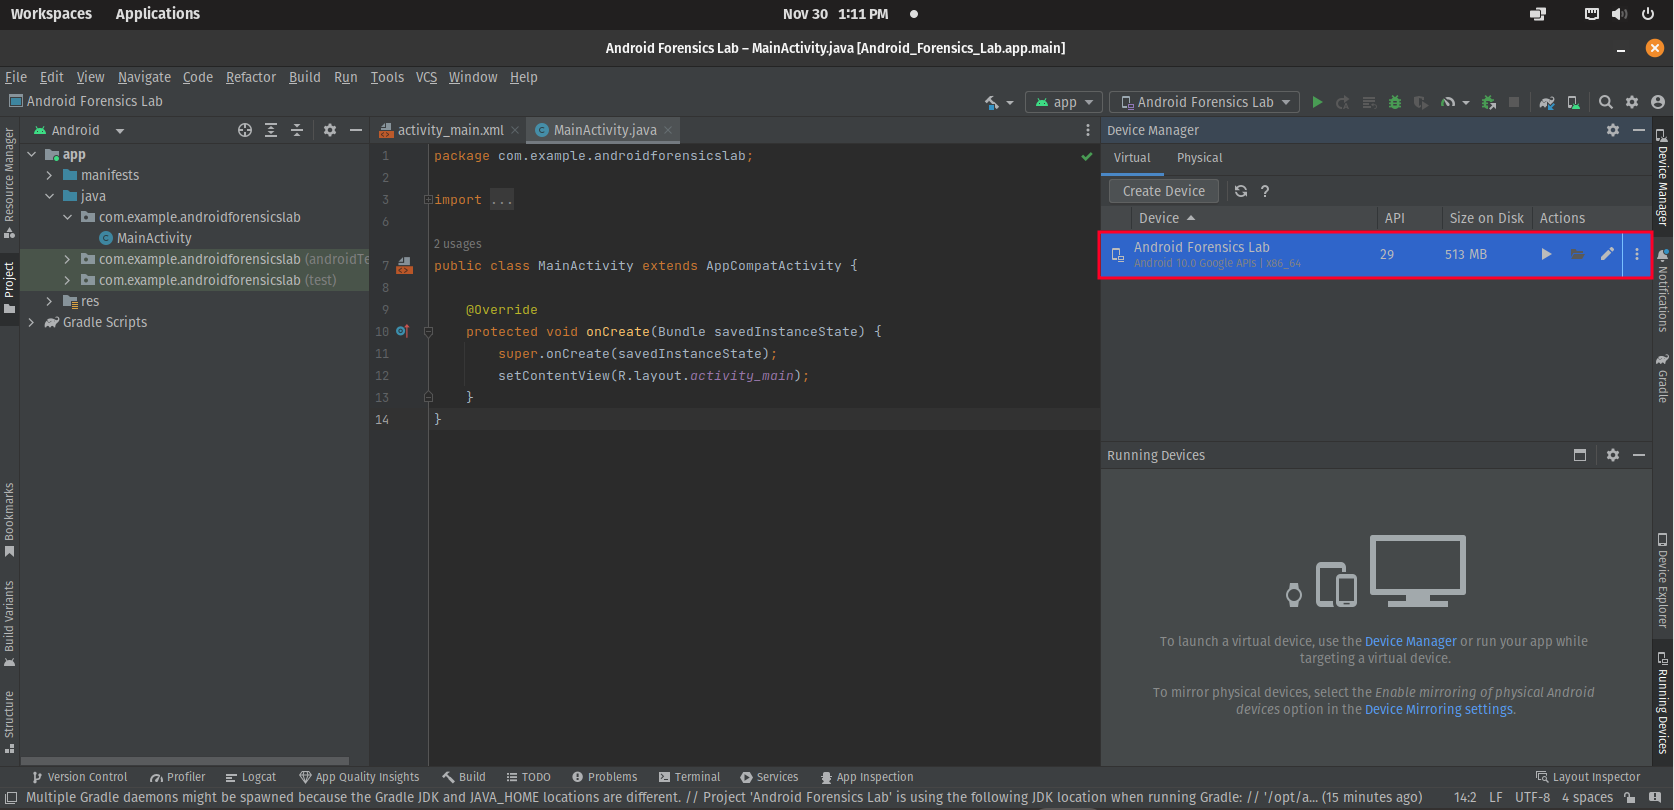
- Once you make a new project, click on Create Device
- Select the Pixel 2 as your device
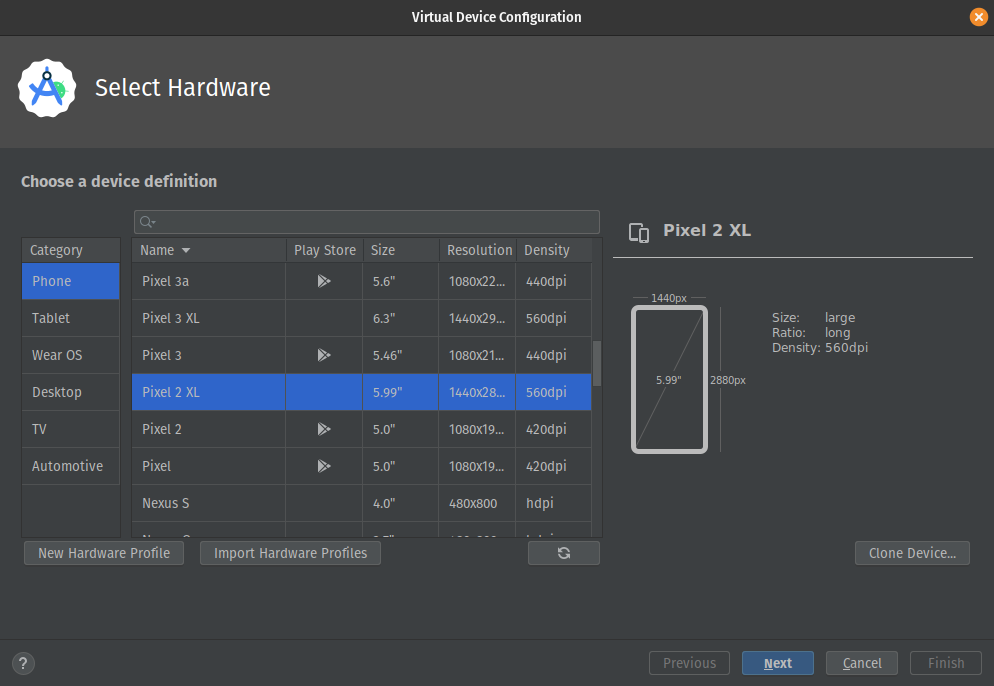
From testing this works best, correct me if I’m wrong
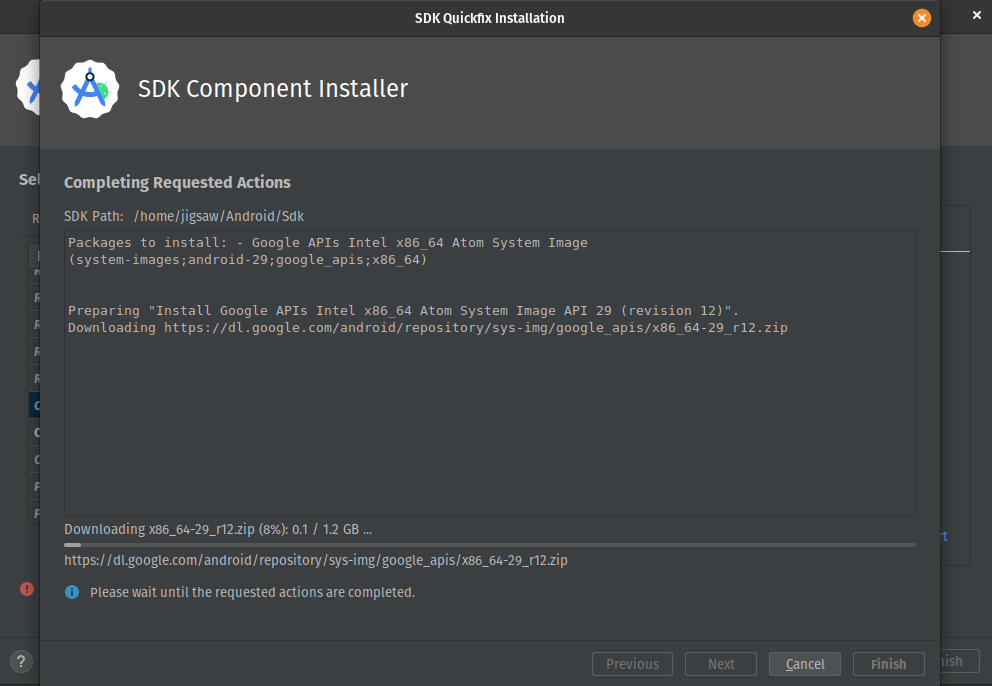
- Lastly, select the system image “Q” from Google’s API (make sure to download and install the image first)

Again, from testing, Android 10 works best
If you’re using a virtual machine make sure Virtualize Intel VT-X/EPT or AMD-V/RVI is enabled to support nested virtualisation
Rooting Your Device
So, you have a virtual Android phone, but it won’t be much if you’re not root or Administrator for Windows people. For that reason, let’s do some Red Teaming by escalating our privileges.
There is already an exploit we can use, so let’s just download it from here.
- You can use
gitto clone the repository
git clone https://github.com/newbit1/rootAVD.git

- Before we root the device, let’s export some variables! (This is very important generally and for scripting purposes)
# For MacOS
export PATH=$PATH:~/Library/Android/sdk/platform-tools/
export EMULATOR=~/Library/Android/sdk/emulator/

# For Linux
export PATH=$PATH:/home/$USER/Android/Sdk/platform-tools/
export EMULATOR=/home/$USER/Android/Sdk/emulator/
- Let’s turn on our device and run
rootAVD.sh
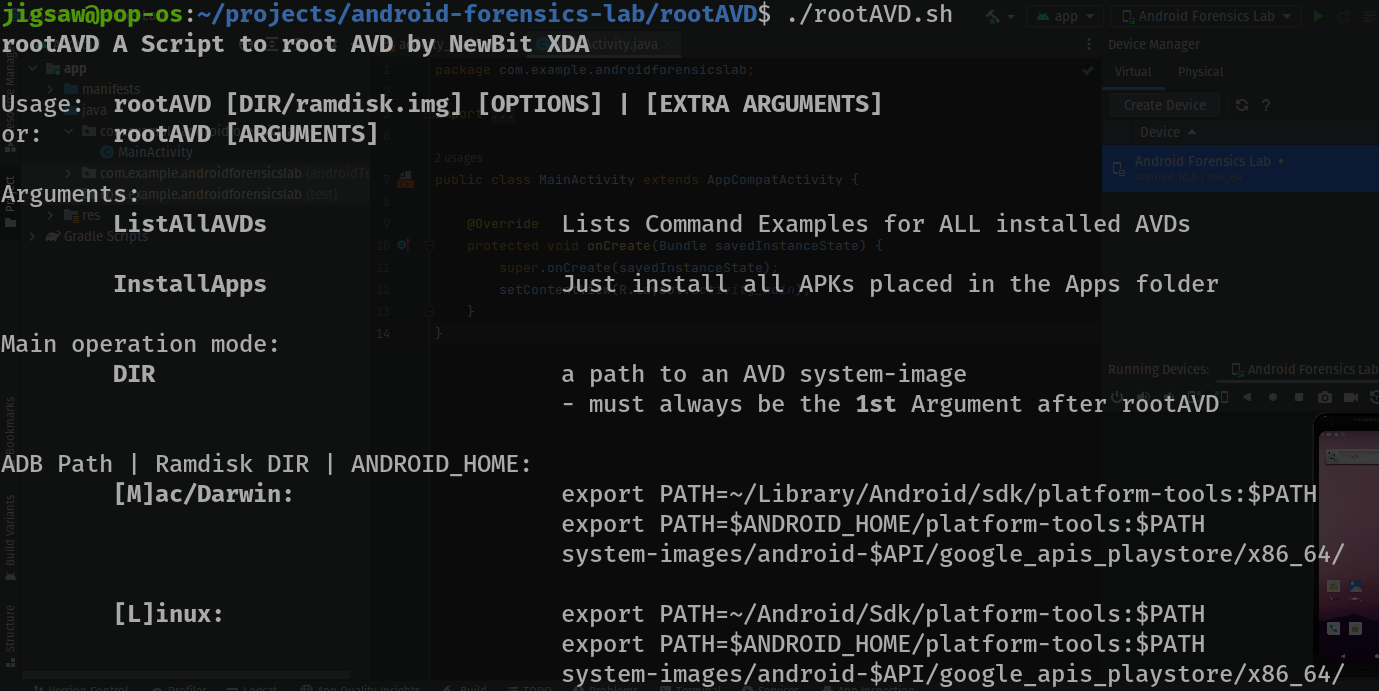
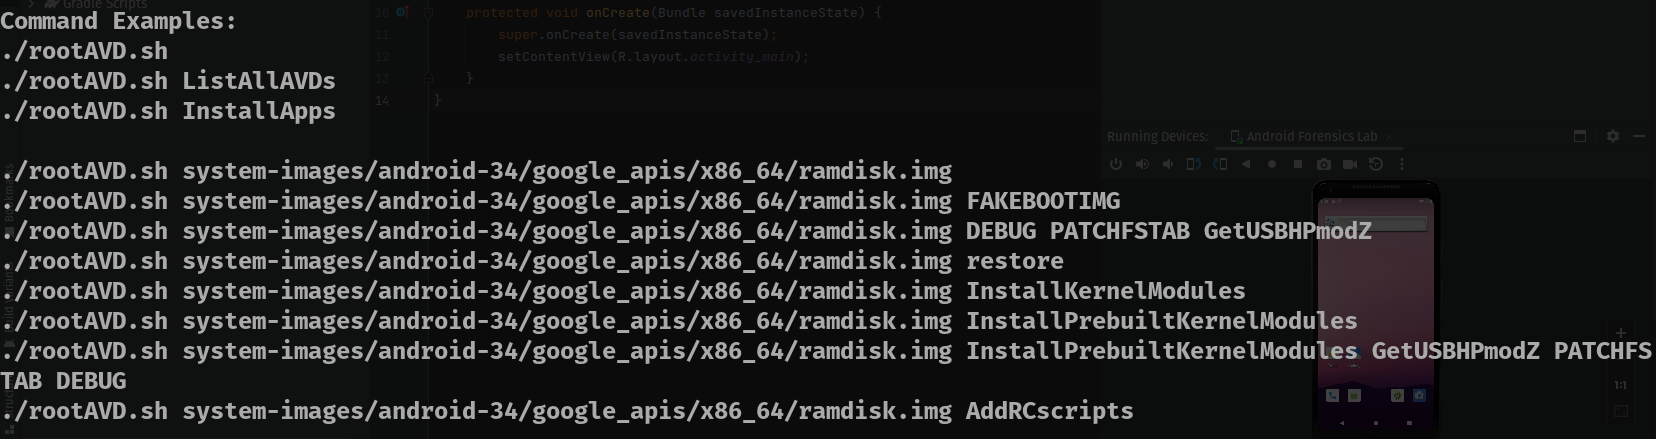
When we run it without any arguments it will prompt us to give an argument of where the ramdisk of the Android device is. So let’s do that!

However, remember that we downloaded API 29 and not the one in the suggestions. The location of the ramdisk that we want is usually in
~/Android/Sdk/system-images/android-29/ramdisk.imgfor Linux
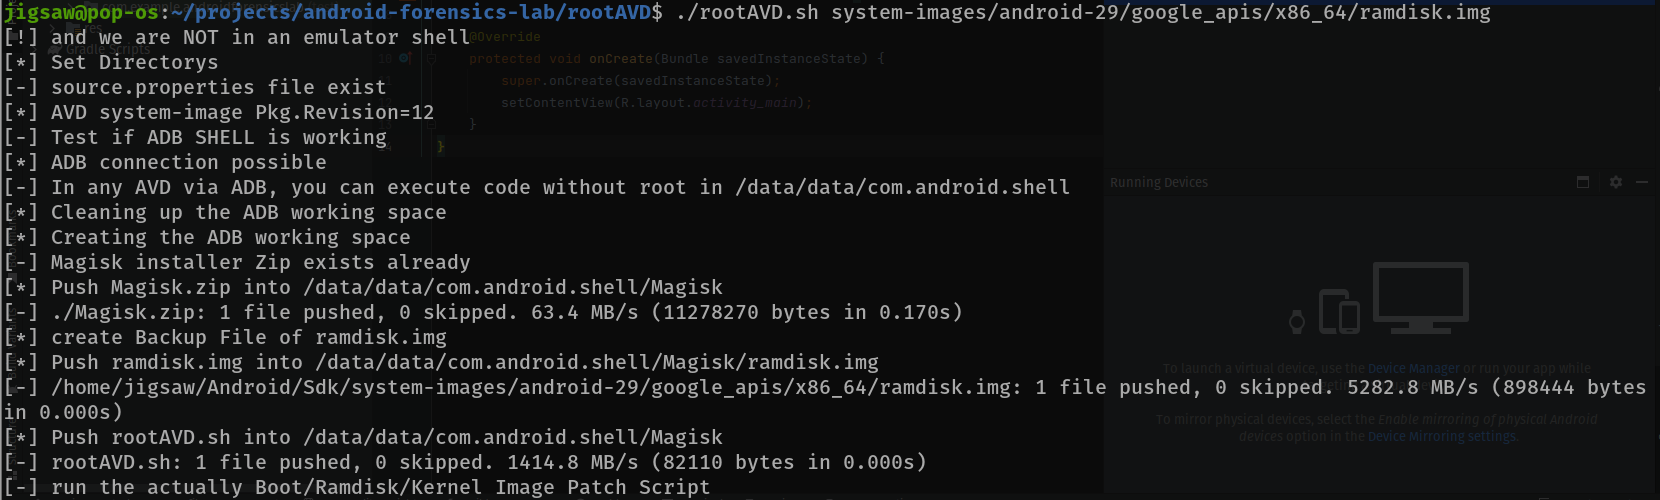
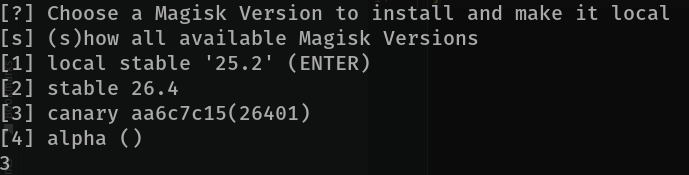
So the exploit will just do its thing to root the Android device, but it’ll ask you for the version of Magisk (an agent to root the device). Choose 3 for canary
- Restart the device
At this point we need to press the off button on our Android device, essentially forcing it to turn off. Then, we turn it on again
- Install Magisk
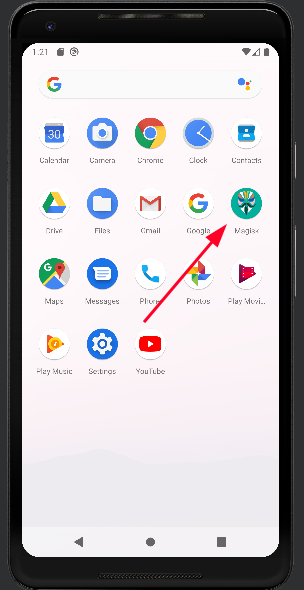
You would notice in your app tray that there’s an app called “Magisk”.
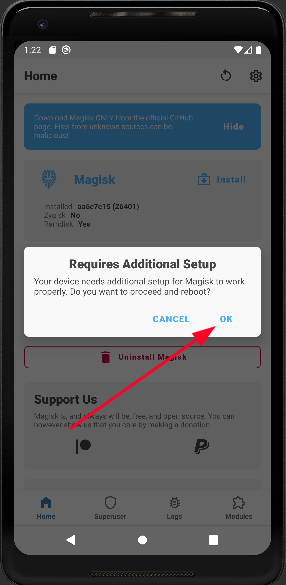
Once you’re in Magisk just click OK.
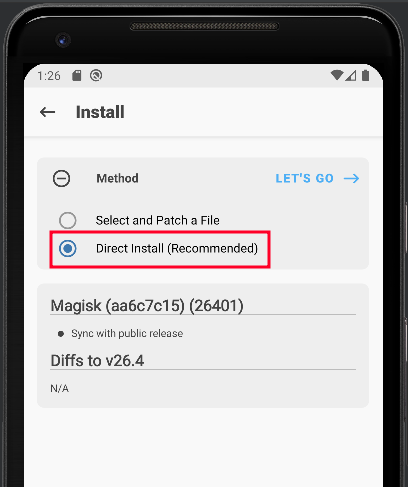
Select Direct Install and click on Let’s Go.
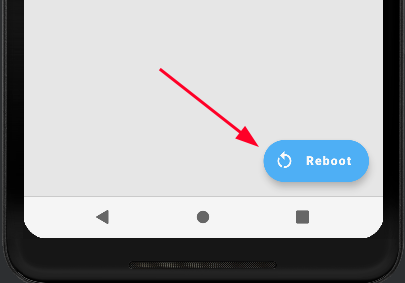
Magisk will root the device and once it’s done, click on Reboot.
- Now that the device has been rebooted, enter into a shell with
adb shell. Then we can escalate our privileges withsu.


Once Grant is activated click it and you will gain root!
Instructions
Automating Root Access
Now that you know how to get root access, let’s try to automate that! First, let’s get our emulator’s name or ID. You can do that with adb devices.

Note that this is the default device most of the time but it may change so watch out. Now on to the scripting part.
send_keystrokes(){
  adb -s $emulator shell input keyevent $1
}

adb -s $emulator shell su &
send_keystrokes 22
sleep 1
send_keystrokes 22
sleep 1
send_keystrokes 22
send_keystrokes 66
-
We will invoke the
sucommand by usingadbwith the switchsto identify the emulator being used. -
The
shellargument will spawn a shell and pass in thesucommand and it will run the root shell in the background with&. -
The send_keystrokes function will use the same method to connect to the emulator in
Step 1. -
It will then send a
keyeventas aninputand an argument of the key. -
In our case, the
22key will be pressed, indicating a right-arrow key input.
You can refer to this for more keyevents.
-
The
sleepcommand is used so that the input won’t be executed immediately. -
So, with that said, when the
sucommand is used,adbwill sent 3 right-arrow keys delayed by 1 second each. -
Then, a keystroke of
66indicating an enter key will click on Grant.
Connecting to the Android Device
exec 3<>/dev/tcp/$host/$port

echo "auth <AUTH CODE>" >&3
- This command will simply make a connection with our Android Device using the file descriptor
3allowing us to interact with our Android device through a shell different from the adb shell with extra commands.
File descriptor 3 (often referred to as “fd3”) is like a special label that a computer program or script can use to manage an extra resource, like a file, network connection, or something else. It’s not built into the system like the standard input (0), output (1), or error (2) streams, but it can be created and used when needed. For example, a program might set up fd3 to read data from a specific file, allowing it to work with that file separately from standard input or output.
- However, before we execute any commands, we need to authenticate ourselves
Even though we’re running this locally… security am I right? lol
- We can do that by making a connection to give us a prompt of where to get our authentication token
# port 5554 is the default port but check your emulator name
#
# jigsaw@jigsaw:-$ adb devices
#
# List of devices attached
# emulator-5554 device
#
# The number at the end is usually the port number you want to connect to

jigsaw@jigsaw:-$ nc 127.0.0.1 5554

- So let’s type
catout the authentication token.

- Now let’s pass that token into our connection!
Now, just now we were able to
ncinto our Android device, why didn’t we just execute commands there? Well, we did it this way so that we can secure a connection in our script and pass commands through the script instead of typing it one by one.
echo "auth <AUTH TOKEN>" >&3
Setting the Time
With the connections established, we can dive into creating our evidence! However, for BAT CTF 2023 we needed the evidence to be at a specific time and I found a way to do that! (Be sure to change the time according to when you want the evidence to be created)
set_time(){
  adb -s $emulator shell "su -c 'toybox date $1'"
}
-
The function above will identify the emulator used with the
sswitch. -
A shell will be spawned through
adband will usesuto run the following command with thecswitch. -
Using
toolboxwith the argumentdateand a second argument with the date formatMMDDHHMMYYYY.SS
Don’t ask me why the date format is weird because I thought so too
Installing Applications
If you were paying attention to the logs when we were escalating our privileges, you would have realised that it installed Magisk. How? Let me show you.
# <APP> is in the form of an APK file

adb -s $emulator install <APP>
With the install argument, we can install any app we want!
Setting the Android Device’s Phone Number
Yea just a warning, do this in another terminal with the same
exports we did previously. The phone will then launch after this
$EMULATOR/emulator -avd Pixel_2_API_29 -phone-number 601163282118 -read-only
-
The
emulatorbinary will use the emulated device we have with theavdswitch -
We can then change the device’s phone number through the
phone-numberswitch -
The
read-onlyswitch is inserted so that that number cannot be edited on run time
Sending Messages
I just want to note, through my research I have not seen any command that can send messages but to script it out manually
- First, you know those irritating text suggestions that pop up when we text? Let’s remove that.
# Referring to the send_keystrokes() function
# Update: After debugging this particular script only works if you rooted the device

adb -s $emulator shell am start -n com.google.android.apps.messaging/.ui.ConversationListActivity

send_keystrokes 61
send_keystrokes 61
send_keystrokes 61
send_keystrokes 61
send_keystrokes 61
send_keystrokes 61
send_keystrokes 61
send_keystrokes 66

send_keystrokes 20
send_keystrokes 20
send_keystrokes 20
send_keystrokes 20
send_keystrokes 66

send_keystrokes 20
send_keystrokes 20
send_keystrokes 20
send_keystrokes 20
send_keystrokes 66


send_keystrokes 66
send_keystrokes 20
send_keystrokes 20
send_keystrokes 66
send_keystrokes 20
send_keystrokes 20
send_keystrokes 66
- Through
adb, we will start ashellandamor the Activity Manager we willstartthe Messaging application
The messaging app by default will be in com.google.android.apps.messaging/.ui.ConversationListActivity
- Then keystrokes will be sent to individually click the buttons in the Messaging app
- Now let’s send the messages.
send_message(){
      adb -s $emulator shell am start -a android.intent.action.SENDTO -d sms:$1 --es sms_body \"$2\"
      sleep 1
      adb -s $emulator shell input keyevent 22
      sleep 1
      adb -s $emulator shell input keyevent 66
}
I’ll be honest, I don’t really know what the
-dand the-esswitch does but I do know it builds out the message we’re going to send (so it’s like sending an email throughtelnet).
-
Through the Activity Manager again, we’ll be calling a function to send a message.
-
The
dswitch will be used with the argumentsms:and the recipient’s number must be typed after that. -
Then, the message will be specified here through the
esswitch with the argumentsms_bodyand a string after that will 2 quotations with escape characters. -
Through
adbagain, we will be automatically clicking the right-arrow key and an enter key after that.
Receiving Messages
receive_message(){
  echo "sms send $1 $2" >&3
}
Don’t worry, the part to receive messages is much more simple (calm down XD)
-
Remember the connection we have just now? Now, we’re just
echoing a special command,smswith the argument to send a message as the first parameter and the phone number the Android device is going to be receiving the message from. -
We will then pass it to the connection have running in the background.
Sending Calls
make_call(){
  adb -s $emulator shell am start -a android.intent.action.CALL -d tel:$1
  sleep 10
  adb -s $emulator shell input keyevent 6
}
-
Through an
adbshelland as well as the Activity Manager, we’ll be calling a function to call a number through thedswitch andtel:followed by a number as an argument. -
However, once you make a call, it will be calling forever.
-
To end the call, send a keystroke with
6as the argument.
The keystroke
6is the key to end a call
Receiving Calls
  sleep 5
  echo "gsm call $1" >&3
  sleep 10
  echo "gsm cancel $1" >&3
-
Through the connection we have, we can send another special command to receive calls.
-
Just send the command,
gsmwith thecallargument followed by a phone number to the connection. -
However, same thing here, the call will go on forever.
-
To end it, just send another
gsmcommand with thecancelargument to the connection.
Transferring Files
adb -s $emulator push $1 <LOCATION>
- Through
adbagain (gotta love that word lol), we’llpushthe file that we want as the argument followed by the location we want the file to end up in the Android device.
Extracting Evidence
# Disable line buffering to read input immediately
  stty -echo
  stty cbreak

  # Read a single character from the user
  read -n 1 key

  # Enable line buffering and echoing
  stty echo
  stty -cbreak

  # Perform an action based on the input received
  echo  # Move to a new line
- So before we actually extract the evidence out of the Android device, let’s pause the script so that if we have anything we want to do manually we have to do.
adb -s $emulator shell "su -c 'tar --exclude=android_image.tar.gz -cvzf /sdcard/Download/android_image.tar.gz /data'"
adb pull /sdcard/Download/android_image.tar.gz
-
When we’re ready, we’re just passing a command with root privileges through the
adbshell. -
It will then use
tarto archive thedatadirectory, excluding the archive file with theexcludeswitch. -
The file will be located within the virtual SD card.
-
For the last time, we will use
adbtopullthe archive file.
Conclusion
In conclusion, is this cool? Yes. Is it realistic? Well… I can’t say. However, it is very good for making CTF challenges and I will be using it in the future. Also, there is a con of making challenges this way. Through ALeapp, we can identify the host machine. With a MacBook, users will also be able to see information about your MacBook through the ._MACOSX and .DS_STORE folders. So, bottom point being, make sure your laptop is clean. *wink*